


Life is better on a porch wreath rail is a simple yet elegant wreath to make your porch pop. If you are looking for a way to spruce up your porch, then this wreath rail tutorial is for you! This project takes less than 30 minutes and requires only the most basic of crafting supplies.
I am so excited to be sharing a fun DIY wreath with you today! This project is perfect for those who love an everyday wreath too because it embodies everything that makes this season amazing. It’s warm colors, festive scents, and cozy vibes are sure to bring some autumn cheer into your home! Let me show you how easy it is to make a Life is Better on a Porch Wreath Rail in just five simple steps!
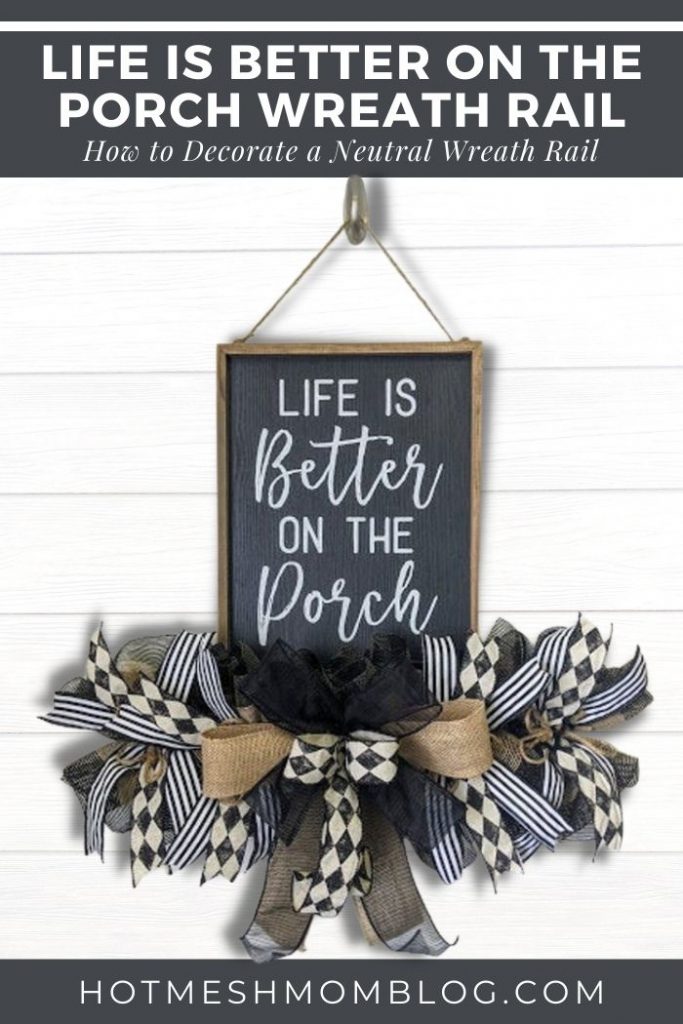
DIY Life is Better on a Porch Wreath Rail
I love this simple and chic look, it is the perfect everyday look to your porch. check out Hot Mesh Mom on Facebook for more wreath ideas or check out my blog, Welcome Wreath Rails for beginners. Life on a Porch wreath rail is a fairly simple wreath rail and I highly recommend for someone just starting out follow along these steps to create this beauty!
Materials Needed to make Everyday Wreath Rail:
- Life Is Better on a Porch Wreath Rail
- 10” Deco Mesh (Black and Burlap)
- Pipe Cleaners
- Ribbon Tail Board
- Rotary Cutter
- 2- 2.5” Ribbon (black & white harlequin, black & white stripe, burlap, and black sheer ribbon)
- Jute string
Instructions for Life is Better on a Porch:
- Start attaching your pipe cleaners. You are going to tie seven across the middle of the board, put 5 across the board.
- Take your rotary cutter and cut 5 pieces of 10” purple mesh and make one ruffle for every twist tie. Roll up the edges a little bit and then scrunch it up the center. Add the center part of the ruffle to the ties.
- Next I use my ribbon tail board to cut out 5 pieces of 2.5” black & white harlequin, 2.5” black & white stripe ribbon. I wrap it around my board 5 times and I cut it off from the roll, remove the wrapped around ribbon, and cut the wrap where they all meet at the top. Once I have my 5-pieces of all three ribbons I will trim the ends of the tails on the ribbon in angle or dovetail.
- Then you will get one piece of black & white harlequin, black & white stripe ribbon., fold them in half and pinch the center together. I put the green on bottom, halloween in the middle and the ghost ribbon on top. Attach the center pinch to the first twist tie on the wreath rail. Repeat with the remaining ribbon tails and twist ties leaving the second pipe cleaner alone for the bow. Spread out your center tails in Xs and then Ks at both ends.
- To add some texture and bring out all of the colors to your design, start by cutting 6- 20” of juke string, take two pieces and make it into a lasso. Pinch the middle to make a bow, lay straight on the twist tie and twist it in. Repeat this to all of the twist ties except for the second pipe cleaner you are going to leave for your bow.
- Now a bow! Take two pipe cleaners and twist the ends together for your bow. Grab your ribbons. Start with a 2.5” of black & white harlequin, measure a 8” tail, pinch and hold onto then twist the ribbon and then measure it. Then make a 5” loop by measuring 10” on a measuring board and then twist.. Make another loop on the other side then trim after a 8” tail.
- I next added the 2.5” black & white stripe ribbon, measured out a 8” tail, pinch and hold onto and then twist the ribbon and then measured it. Then make a 5” loop by measuring 10” on a measuring board and then twist.. Make another loop on the other side then trim after a 8” tail.
- Now use the 2.5” burlap ribbon, to repeat the same process making a 5” loop and 8” ribbon tails.
- Finally take the 2.5” red plaid ribbon and repeat the same process making a 5” loop and 8” ribbon tails.
- Take two pipe cleaners and twist the ends together to make one long pipe cleaner. Remove your bow from your fingers and use the long pipe cleaner to secure the center of the bow, twisting it off at the back nice and tight.
- Use the pipe cleaners on the bow to push through the mesh and attach the bow to the wreath rail.
The simplest wreath can be the most beautiful. This easy-to-make everyday wreath is perfect for those who love to spend time sitting on their porch, front steps, or just loves to decorate their front door with something beautiful. It’s simple enough that you could make one in just 30 minutes. Let me know how yours turns out by sharing with Hot Mesh Mom on Facebook.
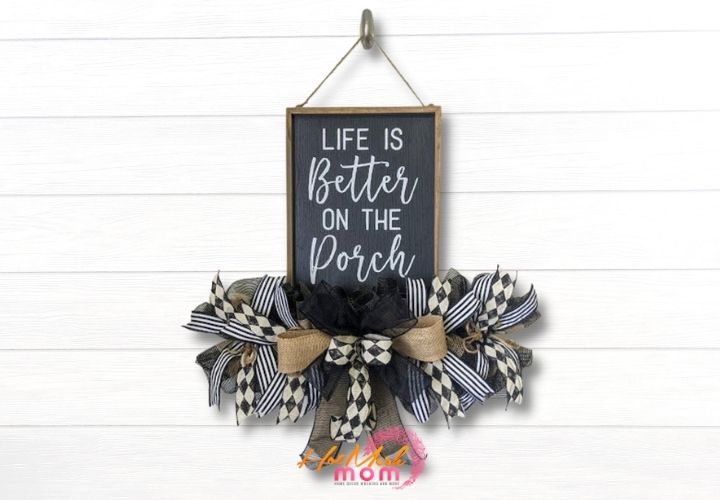
Life Is Better on a Porch Wreath Rail
Learn how to make this everyday wreath rail that celebrates that life is better on a porch!
Supplies
10” Deco Mesh (Black and Burlap)
2- 2.5” Ribbon (black & white harlequin, black & white stripe, burlap, and black sheer ribbon)
Directions
- Start attaching your pipe cleaners. You are going to tie seven across the middle of the board, put 5 across the board.
- Take your rotary cutter and cut 5 pieces of 10” purple mesh and make one ruffle for every twist tie. Roll up the edges a little bit and then scrunch it up the center. Add the center part of the ruffle to the ties.
- Next I use my ribbon tail board to cut out 5 pieces of 2.5” black & white harlequin, 2.5” black & white stripe ribbon. I wrap it around my board 5 times and I cut it off from the roll, remove the wrapped around ribbon, and cut the wrap where they all meet at the top. Once I have my 5-pieces of all three ribbons I will trim the ends of the tails on the ribbon in angle or dovetail.
- Then you will get one piece of black & white harlequin, black & white stripe ribbon., fold them in half and pinch the center together. I put the green on bottom, halloween in the middle and the ghost ribbon on top. Attach the center pinch to the first twist tie on the wreath rail. Repeat with the remaining ribbon tails and twist ties leaving the second pipe cleaner alone for the bow. Spread out your center tails in Xs and then Ks at both ends.
- To add some texture and bring out all of the colors to your design, start by cutting 6- 20” of juke string, take two pieces and make it into a lasso. Pinch the middle to make a bow, lay straight on the twist tie and twist it in. Repeat this to all of the twist ties except for the second pipe cleaner you are going to leave for your bow.
- Now a bow! Take two pipe cleaners and twist the ends together for your bow. Grab your ribbons. Start with a 2.5” of black & white harlequin, measure a 8” tail, pinch and hold onto then twist the ribbon and then measure it. Then make a 5” loop by measuring 10” on a measuring board and then twist.. Make another loop on the other side then trim after a 8” tail.
- next added the 2.5” black & white stripe ribbon, measured out a 8” tail, pinch and hold onto and then twist the ribbon and then measured it. Then make a 5” loop by measuring 10” on a measuring board and then twist.. Make another loop on the other side then trim after a 8” tail.
- Now use the 2.5” burlap ribbon, to repeat the same process making a 5” loop and 8” ribbon tails.
- Finally take the 2.5” red plaid ribbon and repeat the same process making a 5” loop and 8” ribbon tails.
- Take two pipe cleaners and twist the ends together to make one long pipe cleaner. Remove your bow from your fingers and use the long pipe cleaner to secure the center of the bow, twisting it off at the back nice and tight.
- Use the pipe cleaners on the bow to push through the mesh and attach the bow to the wreath rail.
Recipe Video
Just pin life on a porch wreath rail tutorial below to find the instructions later!


